Print settings and your logo on invoices
Put your logo, address and footer on invoices and receipts, and choose the paper size and number of copies for each branch.
Your invoices, receipts and vouchers print with the logo and details of the branch they are made in. Set the logo once, then choose the paper and what prints for each branch.
Before you begin
- Your company profile is filled in. See Set up your company profile.
- Have your logo as a PNG, JPG, GIF or WebP file of 2 MB or less.
- Know the paper your printer uses: A4, A5, or a thermal roll of 80 mm or 58 mm.
Where to find it
- Company logo: Settings → Configuration → Company.
- Branch logo, print name and paper: Settings → Configuration → Branches.
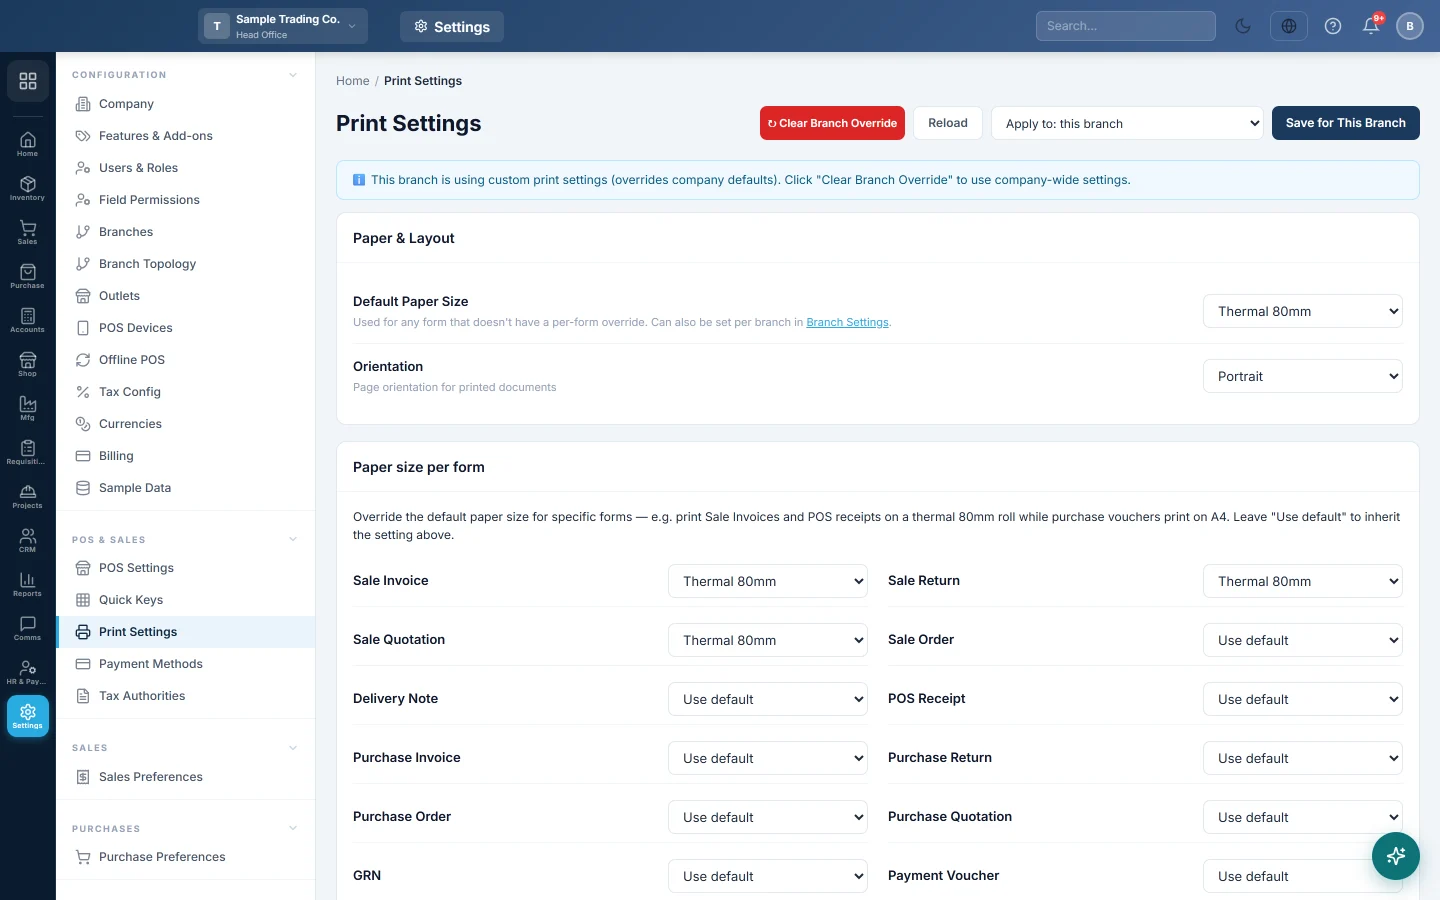
- What prints and how: Settings → POS & Sales → Print Settings.
Add your logo
- Open Settings → Configuration → Company.
- Under Company Logo, click Upload Logo and choose the image.
- Click Save Changes.
Every branch prints this logo unless it has its own.
Give a branch its own logo or name
- Open Settings → Configuration → Branches and click Edit on the branch.
- Under Print Settings, type a Print Name if the branch trades under another name. Leave it blank to use the branch name.
- Upload a Branch Logo if the branch has its own.
- Keep Show logo on printouts ticked. Untick it to print the Print Name as text instead of a logo.
- Choose the branch's Paper Size and click Update.
The branch's Address, Phone and NTN / Tax Number on the same form are what print in the invoice header.
Choose what prints
Print settings are saved per branch. Switch to the branch in the top bar first.
- Open Settings → POS & Sales → Print Settings.
- Under Paper & Layout, choose the Default Paper Size and the Orientation.
- Under Paper size per form, set any form that prints on other paper, for example POS Receipt on Thermal 80mm.
- Under Print Content Options, keep Show Logo on Prints and Show Company Address on, and switch on any others you want, such as Show Bank Details.
- Under Copies & Duplicates, set the Invoice Copies, for example 2 for an original and a duplicate.
- Under Custom Content & Footer, type your Receipt / Invoice Footer Text, for example Goods once sold will not be returned.
- Click Save for This Branch.
For each option and the WhatsApp share button, see Print Settings.
Check a print
- Open a sales invoice you have saved. See Make your first sale.
- Click Print and check the logo, address and footer.
- Change the settings and print again until it looks right.
Common questions
My logo does not show on the invoice. Check Show Logo on Prints in Print Settings and Show logo on printouts on the branch. Both must be on.
The receipt is cut off on my thermal printer. Set POS Receipt under Paper size per form to your roll width, Thermal 80mm or Thermal 58mm.
Another branch still prints the old way. Print settings are per branch. Switch to that branch and save there too.
How do I go back to the company defaults? Click Clear Branch Override on Print Settings.
Merci. Si vous avez encore besoin d’aide, écrivez à info@eloerp.net.