Set up your company profile
Add your logo, contact details, tax number, address and regional settings on day one, before you enter any invoice.
Your company profile holds the name, logo and details that print on your invoices, and the currency and dates your books use. Set it up first: the currency locks as soon as you post your first transaction.
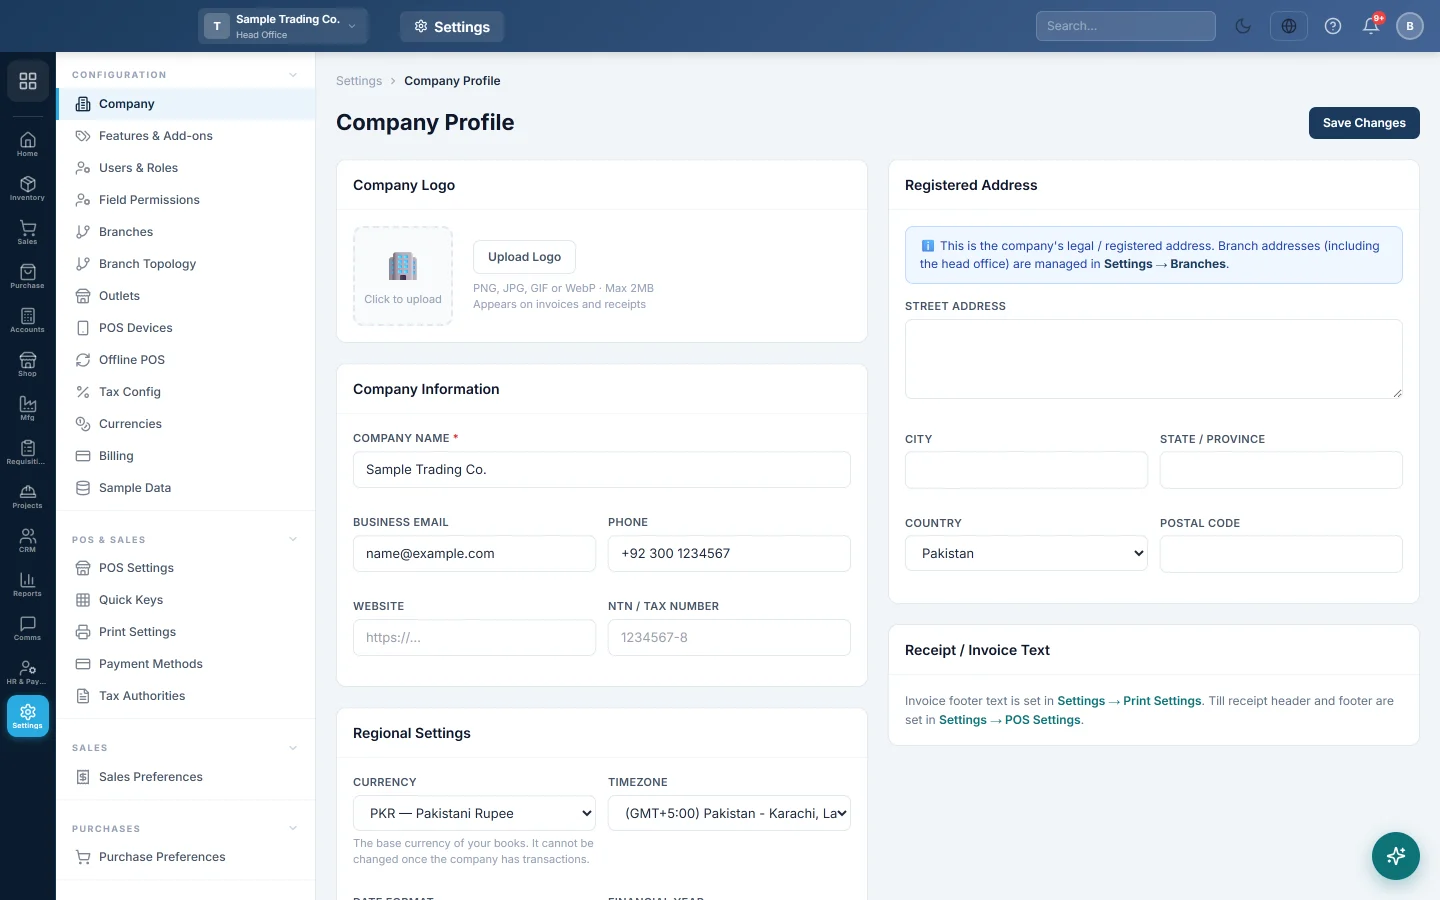
Before you begin
- You are signed in as the owner or another user with the right to edit the company profile.
- Have your logo as a PNG, JPG, GIF or WebP file of 2 MB or less.
- Have your tax registration number, if you have one.
Where to find it
Open Settings → Configuration → Company. The page is called Company Profile.
Check the regional settings first
Sign-up filled these in from your country. Check them before anything else.
- Under Regional Settings, check the Currency. This is the base currency of your books.
- Check the Timezone and choose the Date Format you are used to, for example 11/03/2026 (UK).
- Choose the Fiscal Year Start (Month), the month your financial year begins.
- Choose the Default Report Date Range, the period reports open with.
- Click Save Changes.
Add your logo and details
- Under Company Logo, click Upload Logo and choose the image.
- Under Company Information, check the Company Name and fill in Business Email, Phone and Website.
- Type your NTN / Tax Number.
- Under Registered Address, fill in the Street Address, City, State / Province, Country and Postal Code.
- Click Save Changes. A message confirms the profile is saved.
Check your head office branch
Invoices print the details of the branch they are made in, not the registered address. Your head office branch was created at sign-up with your business name.
- Open Settings → Configuration → Branches.
- Click Edit on the branch marked HQ.
- Fill in its Address, City, Phone and Email, and click Update.
See Add branches and warehouses for the other branch options.
For every field on the page, see Company.
Common questions
My logo was refused. Only PNG, JPG, GIF and WebP images up to 2 MB are accepted. Save an SVG or a large photo as a smaller PNG and upload it again.
The invoice shows the wrong address. Invoices use the branch's address. Change it on the branch under Settings → Configuration → Branches.
Do I need to fill in everything now? Only the currency, time zone and date format matter before your first transaction. The rest can wait, but the logo and phone number make your first invoices look right.
Where do I put the text at the bottom of my invoices? In Print Settings, under Receipt / Invoice Footer Text. See Print settings and your logo on invoices.
Merci. Si vous avez encore besoin d’aide, écrivez à info@eloerp.net.